Navigating Your Google Plus Settings
If you are unsure how to navigate your Google Plus settings, then this post will set you on the right track. If you would first like to know more about the Google Plus platform, then I recommend you read understanding how to use Google plus. Google Plus is a thriving platform, which all serious bloggers should be using.
Now that you have decided to create a Google Plus account, you need to know how to navigate through the Google Plus settings, so let’s get straight into it!
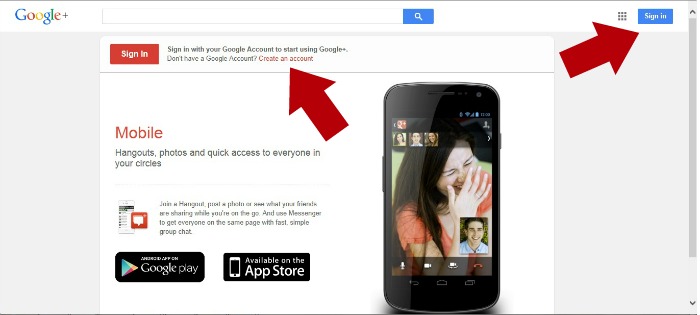
The first thing you need to do is go into the Google website. You will be given the option to either sign or, or create a new account.
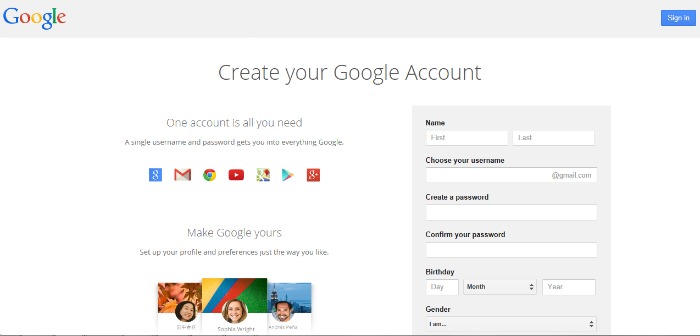
If you selected ‘create an account’, you will be taken to the screen whereby you can enter all your details.
When you feel happy with the information you have provided, go to the next step where you will be welcomed to Google.
Now for the fun part and where we get into the nitty gritty of all those Google Plus settings!!
Google Plus Settings: Public Profile
When you set up your profile you want to add as much detail as you possibly can. Make sure you include a profile picture, and make sure that this is the same picture that you use for all your social profiles. It is good to remain consistency and you want to be recognized!
Try and set up as much as your profile as possible BEFORE you start connecting with others. Whilst it is very exciting and you want to get ‘in there’, hold back until your profile is complete.
At the top of your profile you will see a bar with various tabs, About, Posts, Photos etc…..
If you click onto your “About” tag, you will be able to complete your personal information.
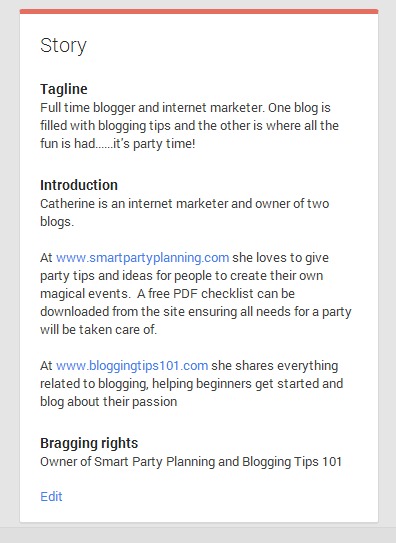
Tagline: In the tagline you want to include a brief explanation about yourself. This will show up underneath your name, so try and give some thought as to what will be beneficial for people to see.
Introduction: Add something about yourself here that allows people to get to know you, but also to let people know they have found the right YOU!
Add your links so people can easily click onto your site.
Pay attention to the first 40-50 characters as this is what appears directly next to your name in the search results. So let people know who you are very early!
Additional Information: The rest of the information on this page is pretty self explanatory. Simply work through it at your own pace and include your work history, your skills and any other information you wish to share.
Remember to save everything that you do!
Google Plus Settings: Your Cover Image
At the top of your profile you have the option to select a cover image. Click on the image area, and it will give you the option to change the cover. It should take you to a screen that looks something like this.
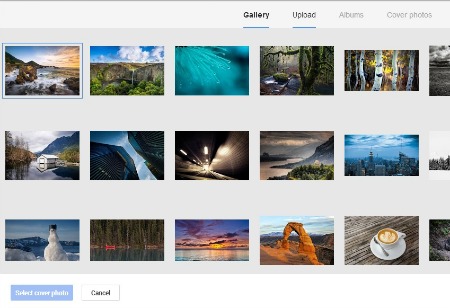 You may choose to upload your own photo or choose one of the general photos in stock. When you are happy with your selection, simply save.
Google Plus Settings: Building Your circles
 Now that your initial profile is complete, you can start to build your circles.
You can have as many circles as you like and you can split these into circles such as “Friends”, “Family”, “Blogging Guru’s”, “Food Lovers”…you get the picture right! When you add a friend to your Google+ profile you add them into a specific circle.
The advantage of having different circles is that this separates your friends so you are only sharing relevant information with them.
For example your Blogging Guru circles might have no interest in a picture of your new pet dog, but your family and friends would love to see it! You therefore only share the information with certain circles.
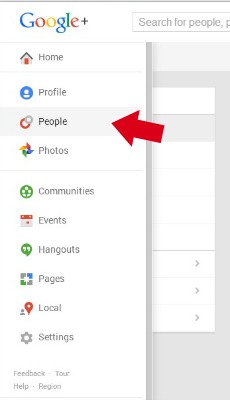
To start to search for people, simply go to the right navigational bar and click on “people”. This will open up a new screen which will also allow you to search via your email contact lists and will bring up some other suggestions for you.
If you click “suggestions”, Google will automatically find people that it thinks you might like to be friends with, based on your interests.
Otherwise if you have someone specific in mind, search for their name in the search bar. When you have found the person you are looking for, simply click ‘Add’ and add them to the relevant circle.
Unlike Facebook, you do not have to have a mutual confirmation for someone to be your friend. You can add anyone to your friend’s lists without needing their permission. If your interests are the same, it is likely that people will add you back, but it is not guaranteed and it is not required!
Google Plus Settings: Posting Updates
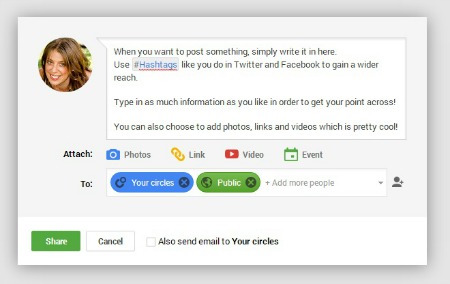
Posting updates is incredibly easy. Simple click “profile” in the top tag section and you will see a box that says “share what’s new”. Click on that box and you can then start to enter your details.
Think about who you would like to share the information with. You can share to all your circles, some of your circles, or make the post public or private. It is entirely up to you what you do, and you can have a play around with it and see what works well for you. When you are happy, simply hit ‘share’.
Google Plus Settings: Joining Communities
Google Plus communities are a great place to connect with others, share your content and find other great content that you are interested in. There are communities in every single niche, so spend some time have a look through to see what interests you.
To locate communities, simply go to your left hand tool bar again and click on ‘communities’. You will then be brought to a page that will allow you to create and search for communities.
When you are happy with a community you have found, request to join. Some communities will allow instant approval, whereas others will need to be approved. Read the community guidelines and expectations before joining. Remember to be active in these communities. They are not just a place for you to link drop! If you don’t want to be seen as a spammer, then don’t act like one. It’s pretty simple really!
You are now on your way to joining the Google Plus community. How does it feel? Have a play around with it, and most importantly have FUN!! This is not supposed to be daunting, so just jump in and enjoy the experience. Add me to your Google Plus circles and enjoy the ride with me!
Would you like to know more about how you can use Google Plus to benefit both your business and you blog? I recommend you take a peek at the learn how to blog program, which will not only go into enormous detail about Google Plus, but also the many other social media networks. Use the support of others to reach your full potential!
Have you been using the Google Plus platform for long? What have been your experiences so far? Please share your thoughts with us below.




This article has been a big help in improving my own Google+ profile. Well written and easy to follow!
Wonderful Dawn, that’s great to hear! Looking forward to seeing you around the Google Plus network
Thanks for this Catherine – just started to update my G+ – with your help
Wonderful Peter. Glad this post has helped. Look forward to seeing you around Google+
Top points here Catherine. Everyone should be using these points to help rank their pages